 JuicyTalk
Hip2Save may earn a small commission at no extra cost to you via trusted partners and affiliate links in this post. Prices and availability are accurate as of time posted. Read our full disclosure policy here.
This stacked herb garden from a few years ago is still one of my favorite DIY’s ever and will be a beautiful addition to your outdoor patio space too!
Want to plant herbs this year? Consider this stacked herb garden for an easy home DIY project! It is also a convenient and frugal way to incorporate homegrown fresh herbs into your cooking instead of buying them each week from the grocery store!
Creative and space-saving? This stacked herb garden has it all!
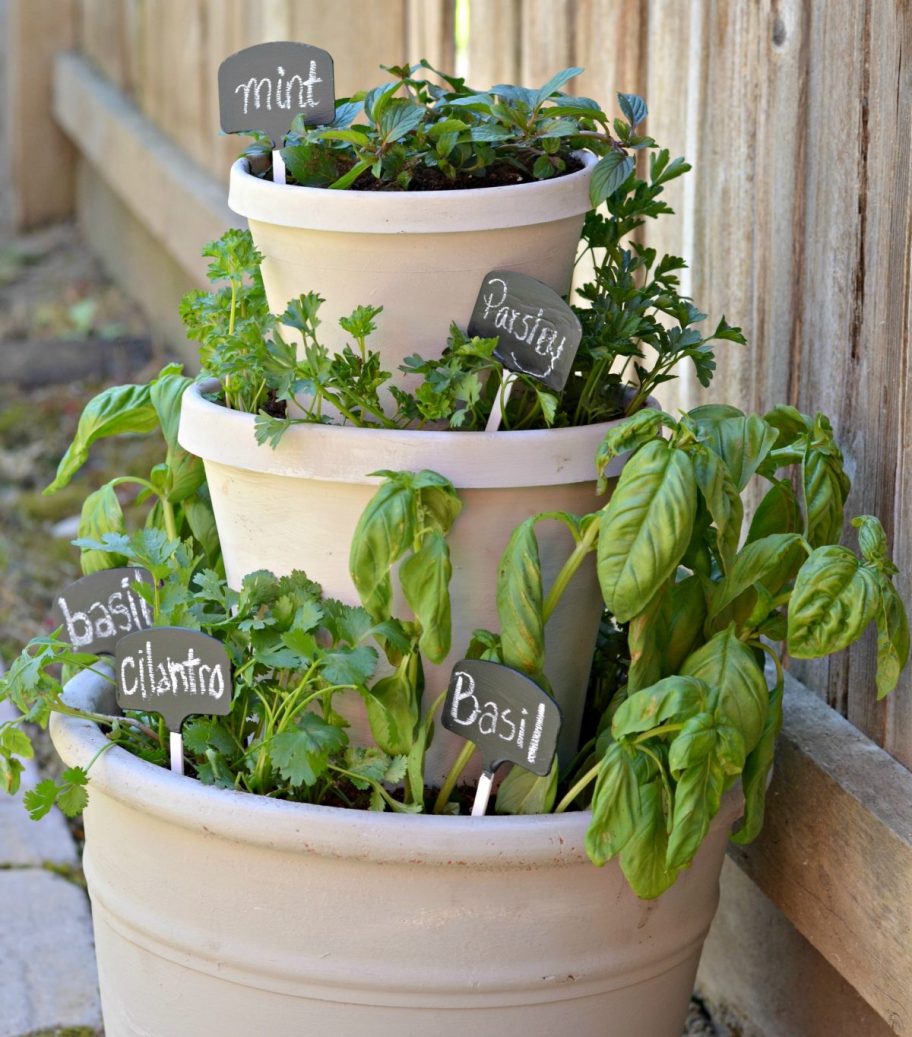
I’m a big fan of container gardening in general because you don’t need a ton of space and can easily move them around if more or less sun is needed.
Of course, you can simply plant herb gardens in a single pot, but there’s something so eye-catching and unique with this stacked pot look. The basic idea is to find 3 different sized pots to use as a tower and then to use two small-sized pots (empty paint cans work too!) upside down for height and to stabilize the planter.
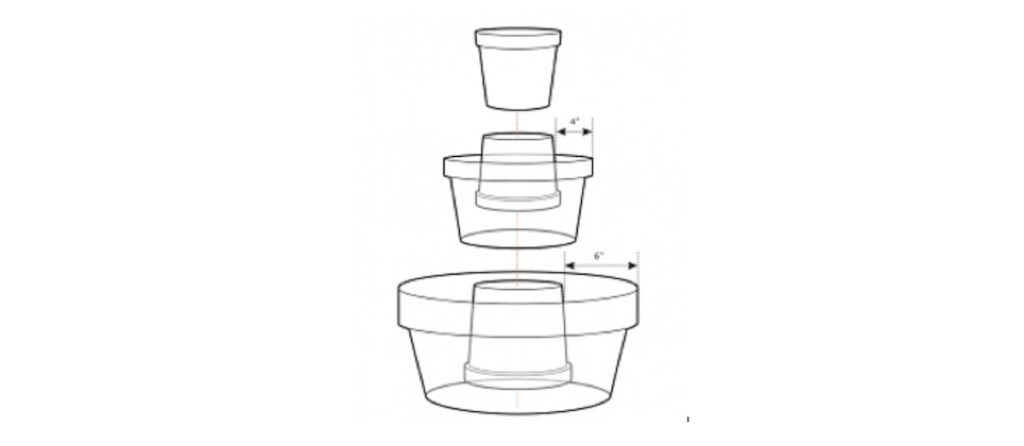
Tips to make your own stacked herb garden:
- You can use mismatched plant pots lying around the house, or purchase new ones to achieve this look. I didn’t have to buy any new ones, and some were plastic and some terra cotta.
- If desired, paint the pots all the same color to make them more uniform, however, it’s an optional step.
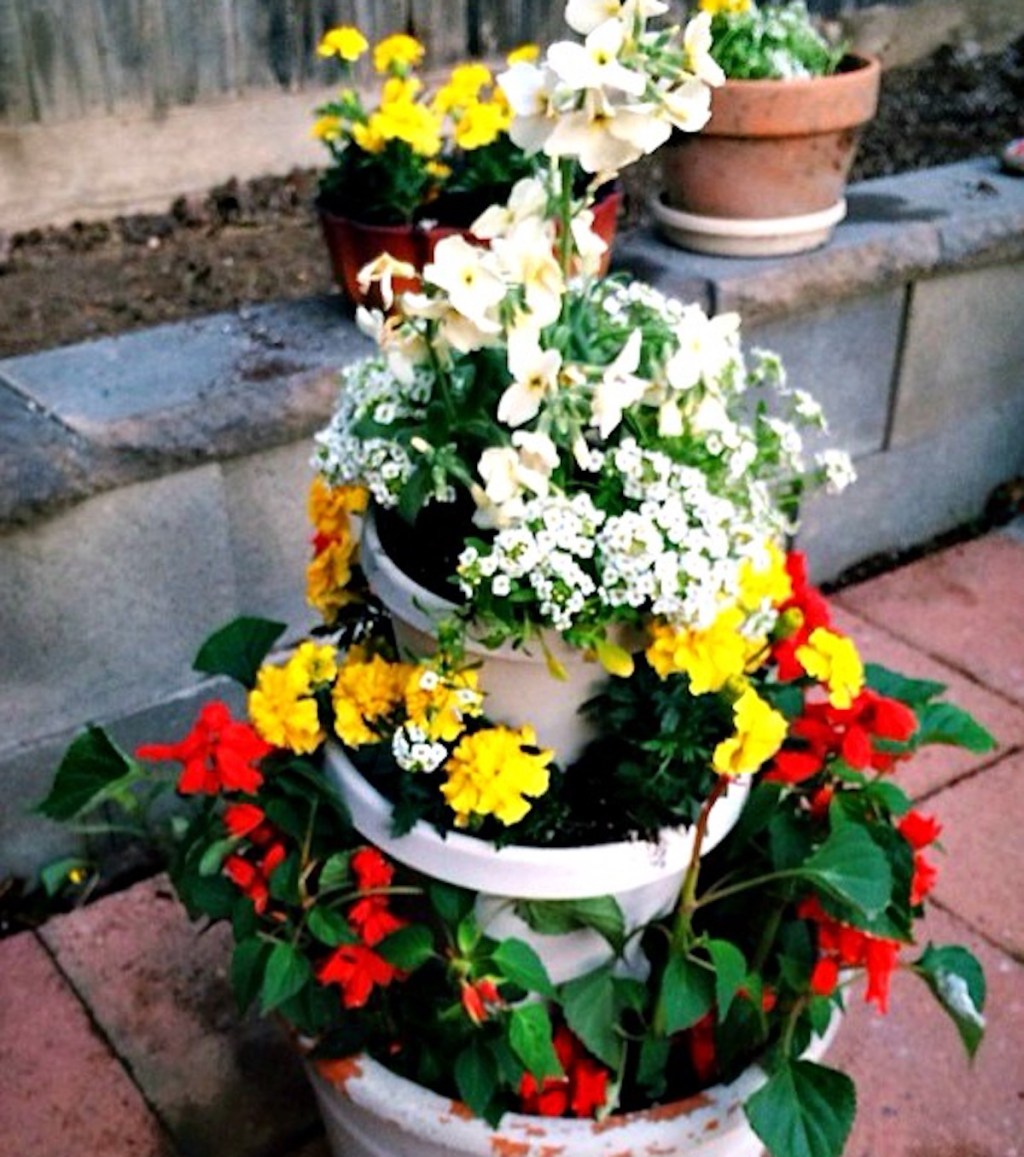
- You can make this same tiered planter and use flowers instead. It doesn’t need to have herbs. For instance, I kept mine going with herbs for a while and then switched to flowers the next year.
- For best results, try to place your herbs in a spot outside where they’ll receive some sun each day. Make sure to water every day or other day when the top inch of soil feels dry. This could vary by location: for instance, in AZ I have to water my containers once or even twice a day sometimes in extreme heat.
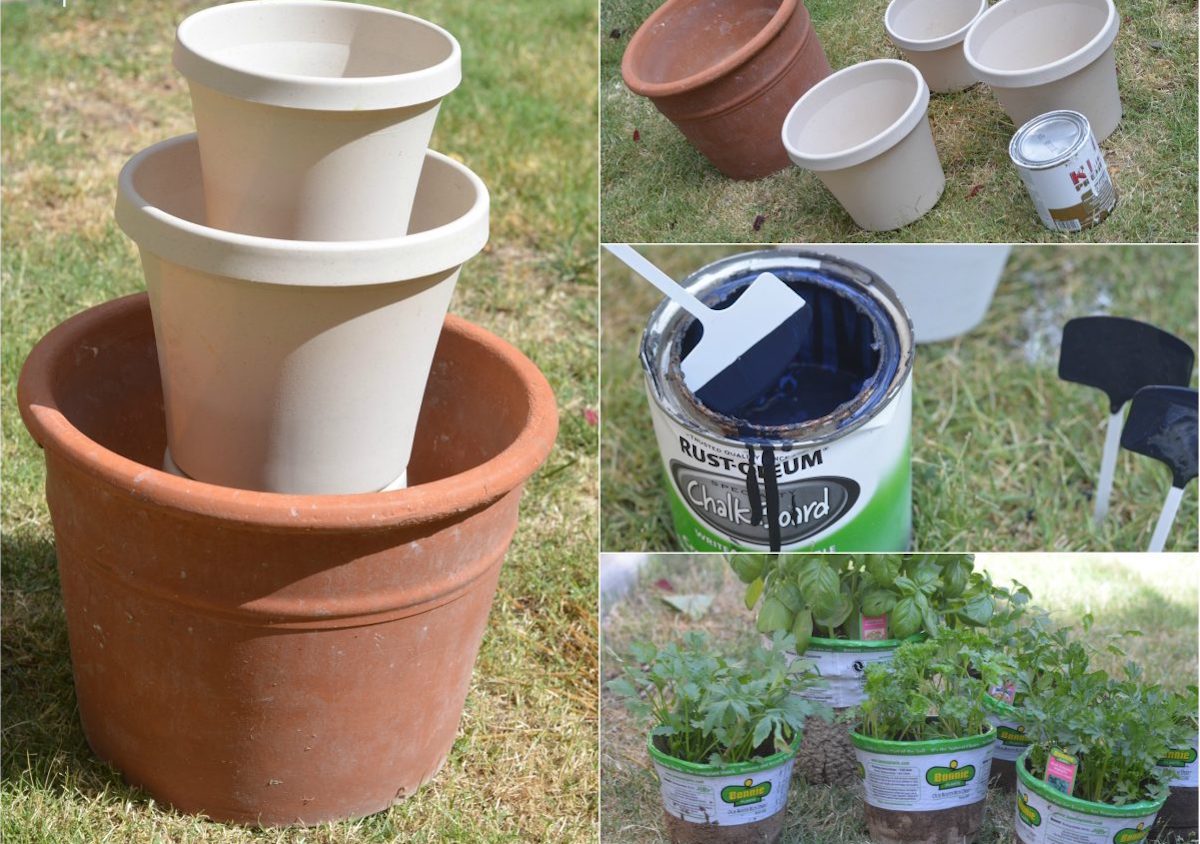
DIY Stacked Herb Garden
1
Paint the pots (if doing this optional step) and let dry.
2
Start with the largest planter pot at the bottom and place an upside-down small pot on the inside.
3
Add potting soil and plant the first tier of herbs around the outside of the pot. Repeat for the second and third-tier. When done, you’ll have three tiers of herbs.
4
On black plant markers (or paint white markers with black paint and let dry) and use a permanent white paint pen to write the names of herbs. Enjoy your fresh herb garden!
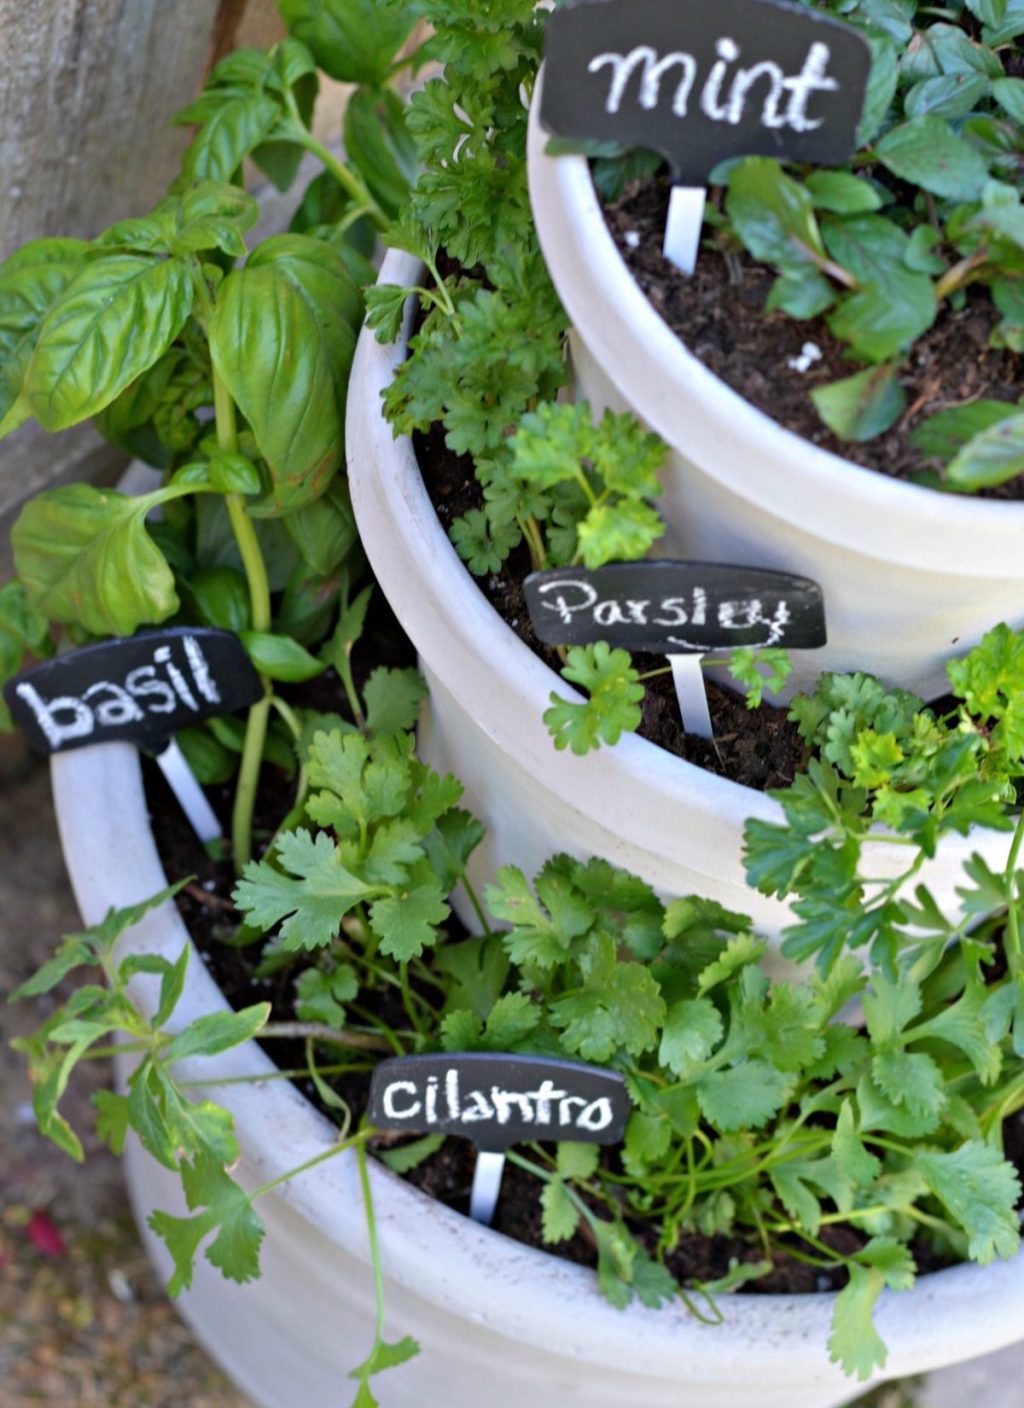
Look at how beautiful it looks when you’re all done! ????
My fresh herbs lasted for almost the entire summer with normal watering – the basil and mint lasted the longest. After that, I chose to fill my pots with $10 worth of annual flowers, and I think they turned out great, too!
This DIY succulent wall brought our patio to life – build it in just a few steps!
About the writer:
Lina has a Bachelor’s Degree from Northern Arizona University with 11 years of blogging and photography experience having work featured in Today.com, Martha Stewart, Country Living, Fox News, Buzzfeed, and HGTV.


